I adore taking pictures outdoors, and in this post, I’ll give my top five suggestions for creating stunning nature images.
I clarify:
- How to use color effectively to create stunning compositions
- Innovative methods to improve your photographs
- How to create artistic effects with props
A lot more!
Ready to photograph natural scenes like a pro? Let’s get going.
1. Look for complementary colors

Beautiful hues abound in nature, including yellow grass, orange fruits, red flowers, green leaves, and green leaves.
Even though these colors alone can improve your portraits, you’ll get the best results if you match the colors on your subject to those found in nature.
You could notice that some flower blossoms, leaves, or pebbles complement your subject’s hair, eyes, lips, or attire.
In order to ensure that your portrait compositions contain both the colors of your subject and the colors of nature, place your subject in front of the harmonizing hues.
When working with your topic, it’s helpful to keep an eye out for various hues. I’d also advise you to spend some time learning about color theory.
Look at a color wheel and make a note of the opposing (sometimes called complimentary) colors; these blend nicely and produce a lot of contrast. I adore complementing hues. I typically look for yellow foliage when my subject is wearing purple.
Additionally, if I’m photographing in an area with a lot of greenery, I’ll use my camera to draw attention to the reds in my subject’s clothing or hair.
Additionally, you should memorize analogous colors, which are colors that are next to one another on the color wheel, and give compositions a serene, balanced feeling.
For instance, I might look for teal water or green leaves to produce a lovely effect if my subject has startlingly blue eyes. Combining various tones of the same color will produce a similar outcome.
2. Be fearless when blurring your subjects.

Use this advice to produce more imaginative nature portraits. Most photographers spend a lot of time attempting to keep their subjects crisp, but if you accept the blur effect, you can really take beautiful pictures!
This is how it goes:
Find a pleasing foreground topic first, anything that is moderately attractive but won’t detract from your main subject. This works well with flowers, leaves, trees, and grasses.
Second, make sure your topic is set back from the foreground subject by a reasonable distance. Ask them to strike a meaningful pose; in my opinion, the pictures turn out best when the action appears intimate, such as a kiss or a mother holding her new baby.
Make sure your subjects really sell the pose if you want the effect to appear to have been created on purpose rather than by mistake missing the focus on your subjects.
Set a wide aperture third. And pay attention to the focal point. In the event that your camera tries to focus on a background subject, you can always switch to single-point AF area mode and choose a focus point over your foreground subject.
Alternatively, you can disable the autofocus on your lens and manually position the point of focus. Take your photo, and then view it on your camera’s LCD.
Widen the aperture even more, or ask your subjects to move back, if they appear a little too sharp. If your subjects are too fuzzy, you might perhaps move them into the foreground or use a smaller aperture.
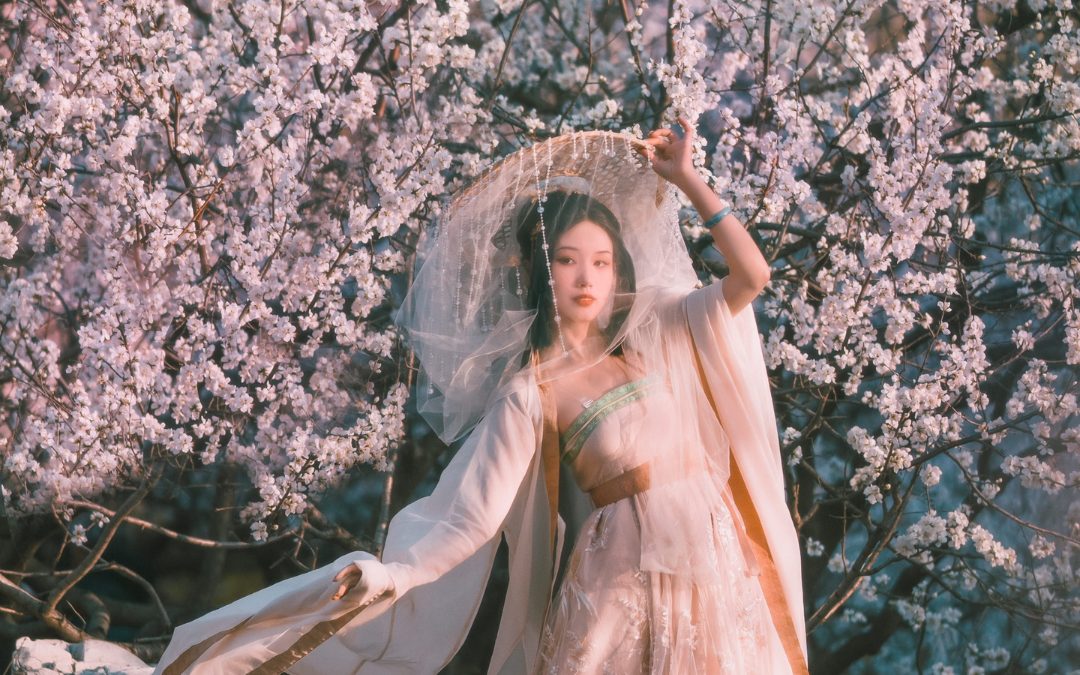
3. Ask your subjects to interact with nature

Standard nature portraits are lovely, but after a time, they may get monotonous, both for the subject and the spectator.
Why not change things up by using a few props? While you could always use traditional props (such as umbrellas, baskets, and fairy lights), I would advise you to include natural props in each composition.
In addition to making your subject and nature seem more natural, these accessories will give the image a more authentic sense.
To aid you, consider the following suggestions for props:
- Rocks, logs, and branches (as perches)
- Snow or leaves (your subject can blow these out of their hand or throw them in the air)
- Lakes and streams (for your subject to walk in)
- Flowers (for your subject to hold, smell, or tuck in their hair)
The possibilities are truly endless; if you’re lacking inspiration, simply keep your eyes open the next time you’re outside. You’ll definitely think of some fantastic prop ideas, I bet!
One thing, though: Try to leave everything the same as you found it or better. Be nice to the natural world around you.
Keep in mind that there wouldn’t be anything left to admire if everyone snapped trees, plucked a bouquet of wildflowers, or trampled undisturbed delicate foliage.
4. Combine natural and artificial elements

I’d advise you to add man-made components to the natural setting once you’ve mastered the technique of using natural props in your nature photos.
For instance, you might set up a seat or a couch in a field, or you could bring a vintage typewriter or a bunch of balloons.
The resulting images will have intriguing contrast, and if you’re ready to really experiment, you can tell all kinds of amusing stories.
Bring out a table for an Alice in Wonderland effect, or add swords and shields for a more medieval setting. You may even include a chandelier in your scenarios.
It’s crucial to refrain from endangering the natural environment, as I said in the prior suggestion. However, if you take precautions, you may avoid harm and even get breathtaking natural photos in the process!
5. Take broader portraits

Close-up photographs look fantastic and frequently do a terrific job of expressing a subject’s personality.
However, if you want to take pictures that are more artistic, you might think about approaching the topic from a distance, either by moving backward a few steps or by using a wide-angle lens.
Try to surround your subject with natural characteristics such that they are a tiny (but significant!) component of the overall composition.
This method of creating an environmental picture adds size and creates photographs with a strong feeling of location.
The broader perspective enables you to combine a human subject with nature rather than painting a picture of a human person in the wild.
Finding appropriate supporting sequences is the hardest part. I’d suggest looking for picturesque locations that already produce lovely images, then just adding the subject to the frame.
Final thoughts on nature picture tips:

Now that you are aware of how to take lovely photos in nature, maybe you are motivated to grab your camera and go outside!
Therefore, keep in mind the advice I provided. And begin considering potential picture shoots. Consider combining both natural and manufactured props.
Have fun and good luck!
